Canyon Storm Battlefield Super‑Lazy Cheatsheet (Dawnbreakers Side)
Last updated: 2026-01-30
For quick execution and fewer mistakes. Full version: Beginner Field Guide.
Official rules: Official Rules.
📝 Quick script (copy this)
- Opening: rush the Power Station and Energy Stations to secure early score and energy.
- Mid game: the Rulebringers carry may use
Judgment Descentto stomp clusters; use your numbers to split-capture outer points, or collapse on isolated targets. - After ~12 minutes: Virus Lab unlocks — all-in center; if you can’t win head‑on, rotate Artillery Turret casts to grind durability and troops.
- Last 3 minutes: no matter the score, hold points — objective income flips games.
Two actives (most important)
- Field Hospital: your base transforms and teleports to the position you choose; lasts 30s, continuously restores durability and heals severely wounded for you and nearby allies.
- Artillery Turret: your base transforms and teleports to the position you choose; lasts 30s, continuously damages the nearest enemy base in range.
Skill mechanics (how to cast)
- Skills have a fixed cooldown (CD), and you must charge enough energy through capturing/gathering/kills/garrisoning to use them.
- The game randomly assigns a skill; only after you cast it will the next one be assigned
- When CD is ready and you have enough energy, tap the icon to cast; choose the landing position freely — it’s a free teleport
⚠️ How to survive “Judgment Descent”
- Don’t stack: spread out so one landing can’t delete multiple bases (official panel CD is 300s; blowing away 1 base reduces it by 30s; verify in-game).
- Bait the jump: there’s usually a clear mark/effect; if you’re targeted, teleport at the last moment so they land on empty space.
- If you can tank it, pop Hospital: one stomp is about 5000 durability (a base is about 6000). If you survive, use Hospital immediately to prevent getting finished.
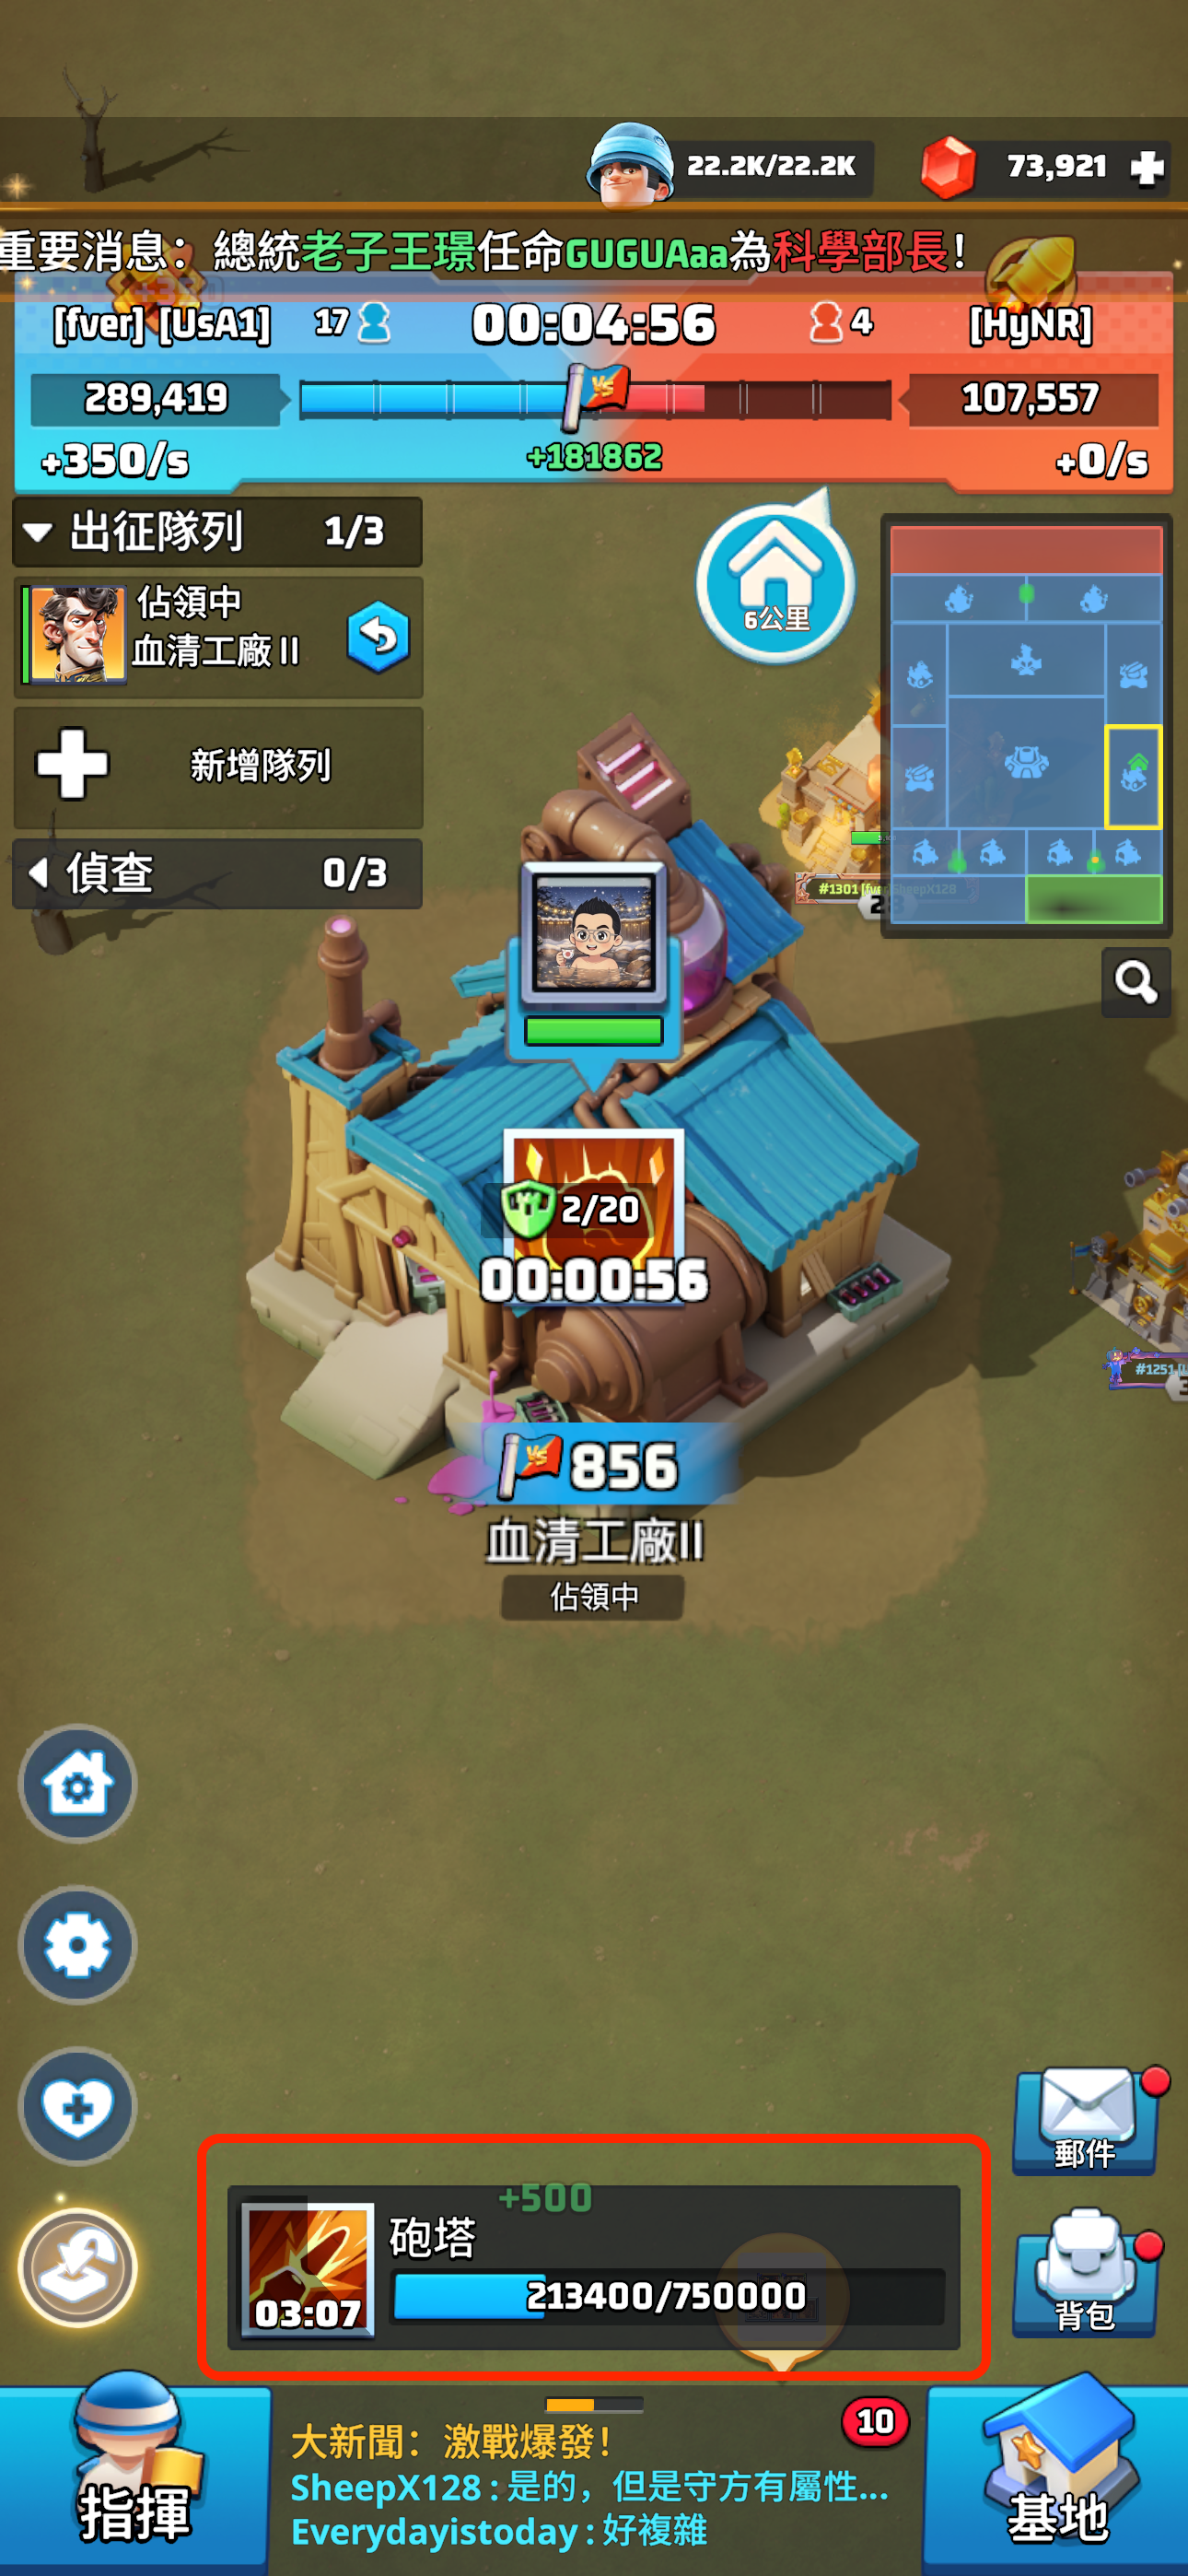
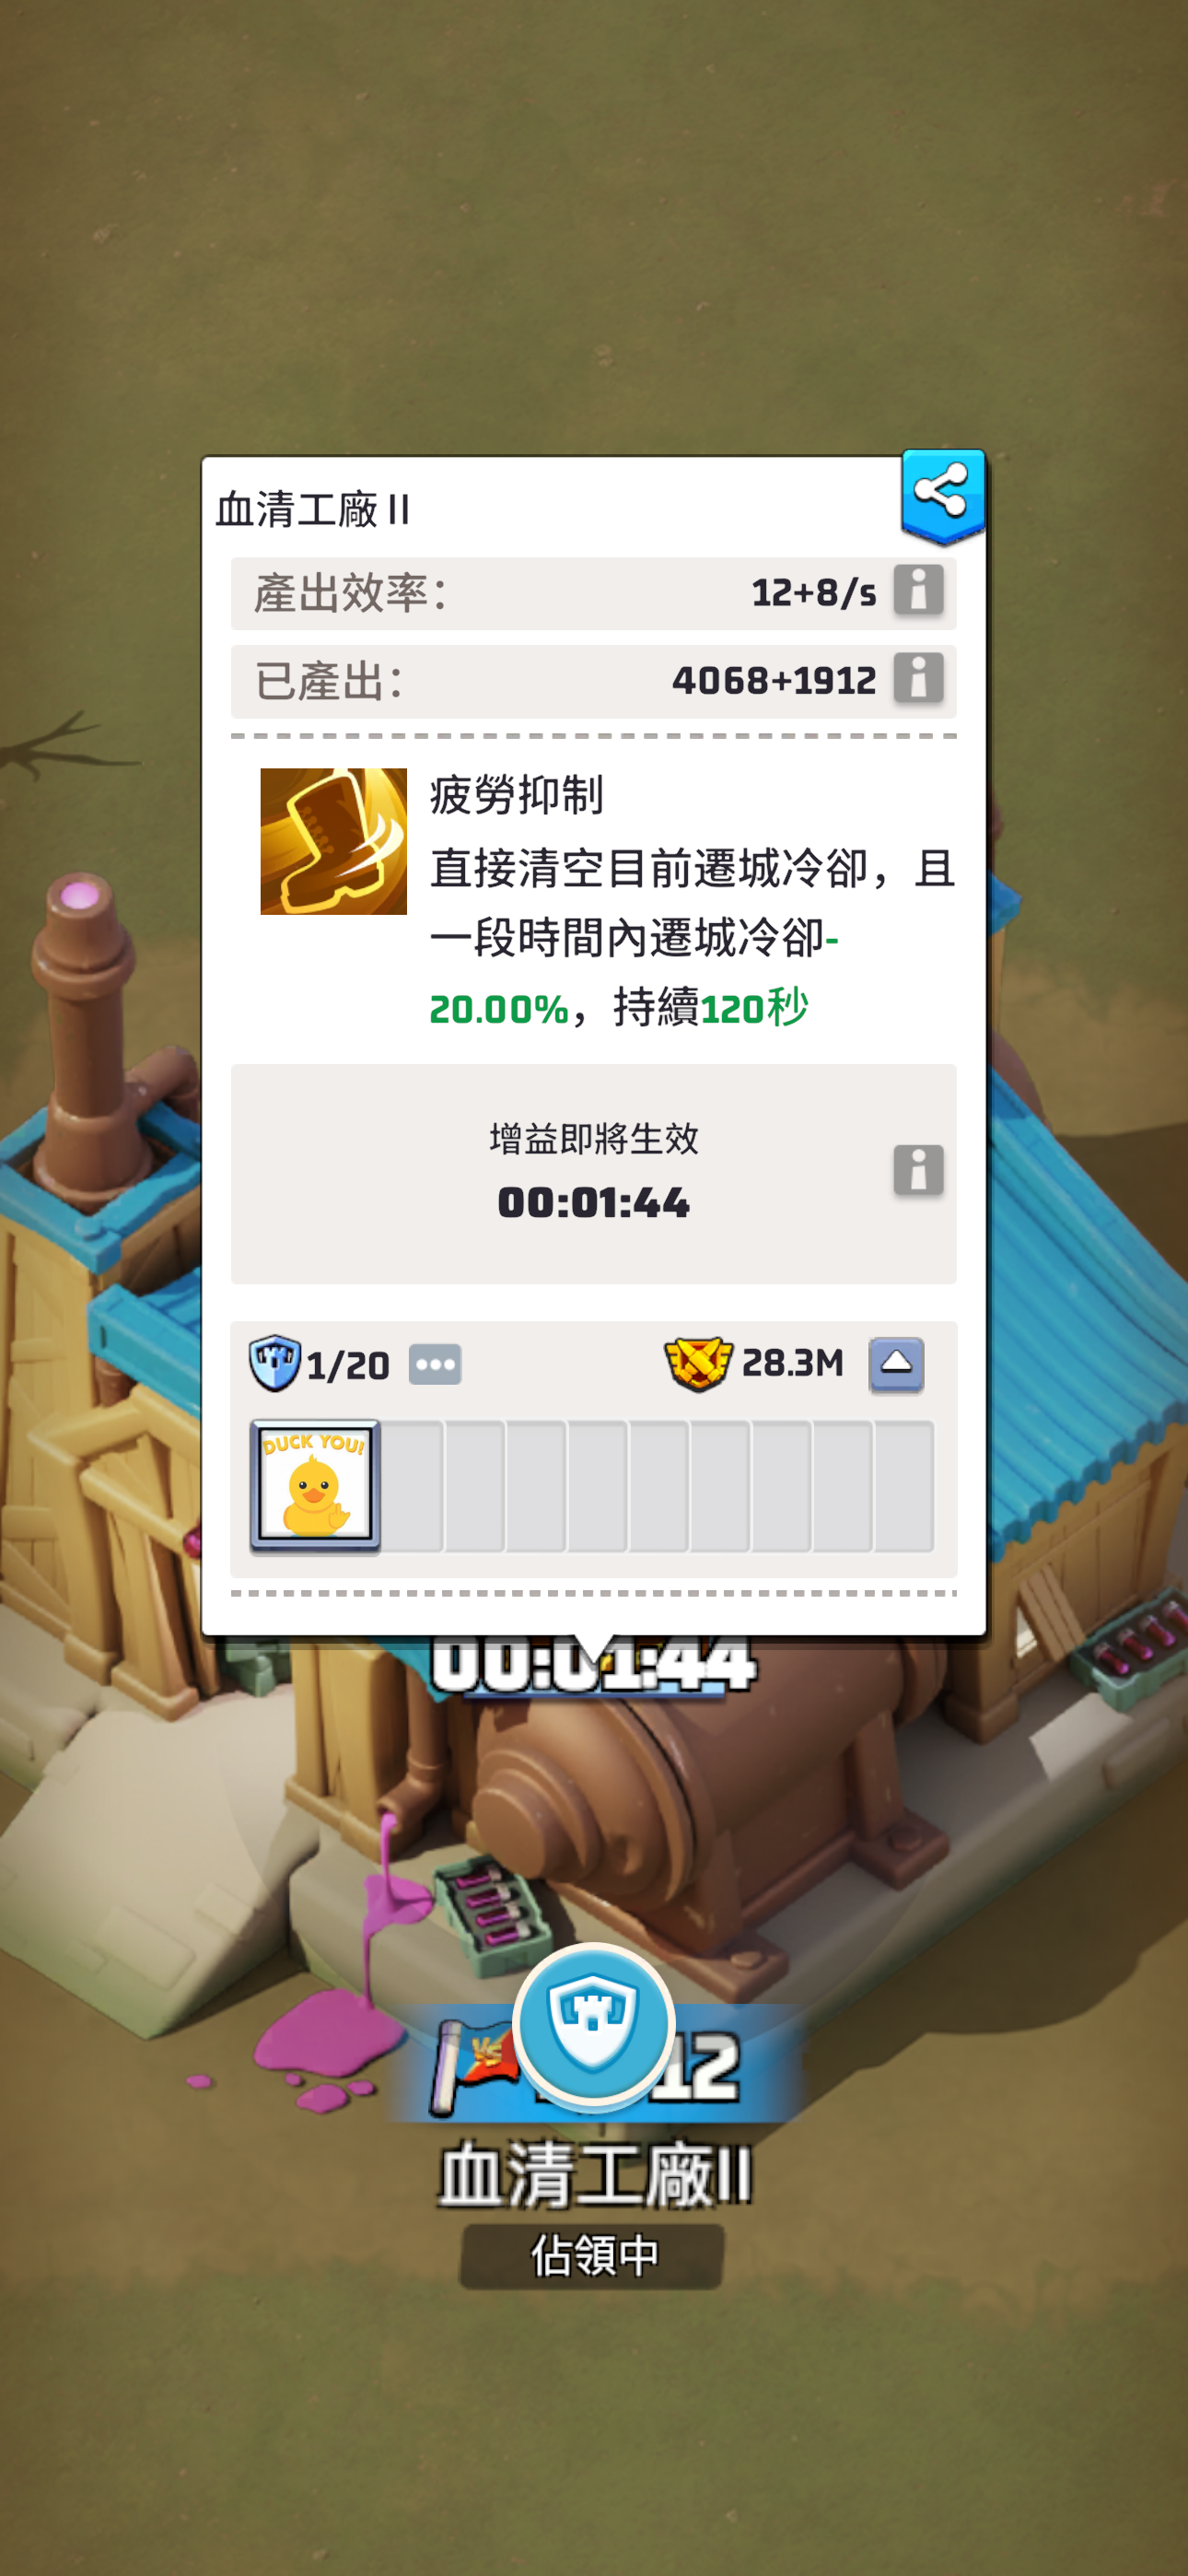
Serum Factory (late-game buff point)
Serum Factory unlocks later; it will randomly spawn a buff, and when the countdown ends it grants the holder the effect.
The official description is “periodically grants a buff (announced in advance)”. If you can, capture/trigger it (e.g., “fatigue suppression” often resets teleport cooldown and reduces teleport cooldown for a short duration).
勘误请在游戏中联系小羊 SheepX128。